
SUPPLIES:
Tile or Mosaic tilesLiquid Nail - Heavy Duty Interior & Exterior (or another tile adhesive)
Grout
Table
Masking Tape
Tweezers
Chopstick or skewers
Small flat screw driver
INSTRUCTIONS:

Step 1:
Preparing your tiles.
If using small mosaic tiles, then skip to next step.
If using regular tiles, you will need to make small pieces.
First I got a used old t-shirt, sewed the sleeves and bottom part and used the neck hole as the opening. I placed that in a shallow box and placed the tiles in the t-shirt, shiny side down. Then with a heavy mallet or hammer went to town smashing the tile. Don't smash into smitherines, but nice, usable pieces, you will want an assortment of a bit larger and some smaller pieces for filler.
I then sorted them out in a plastic container. I liked sorting in 3 piles, small pieces, then larger pieces in triangles and square"ish" ones.

This is the learning part that I would have done differently. Take the time to sand down sharp corners and edges. Otherwise, after you are finished, the sharp pieces can and will stick up over the grout and cut you.
Step 2:
Draw your design

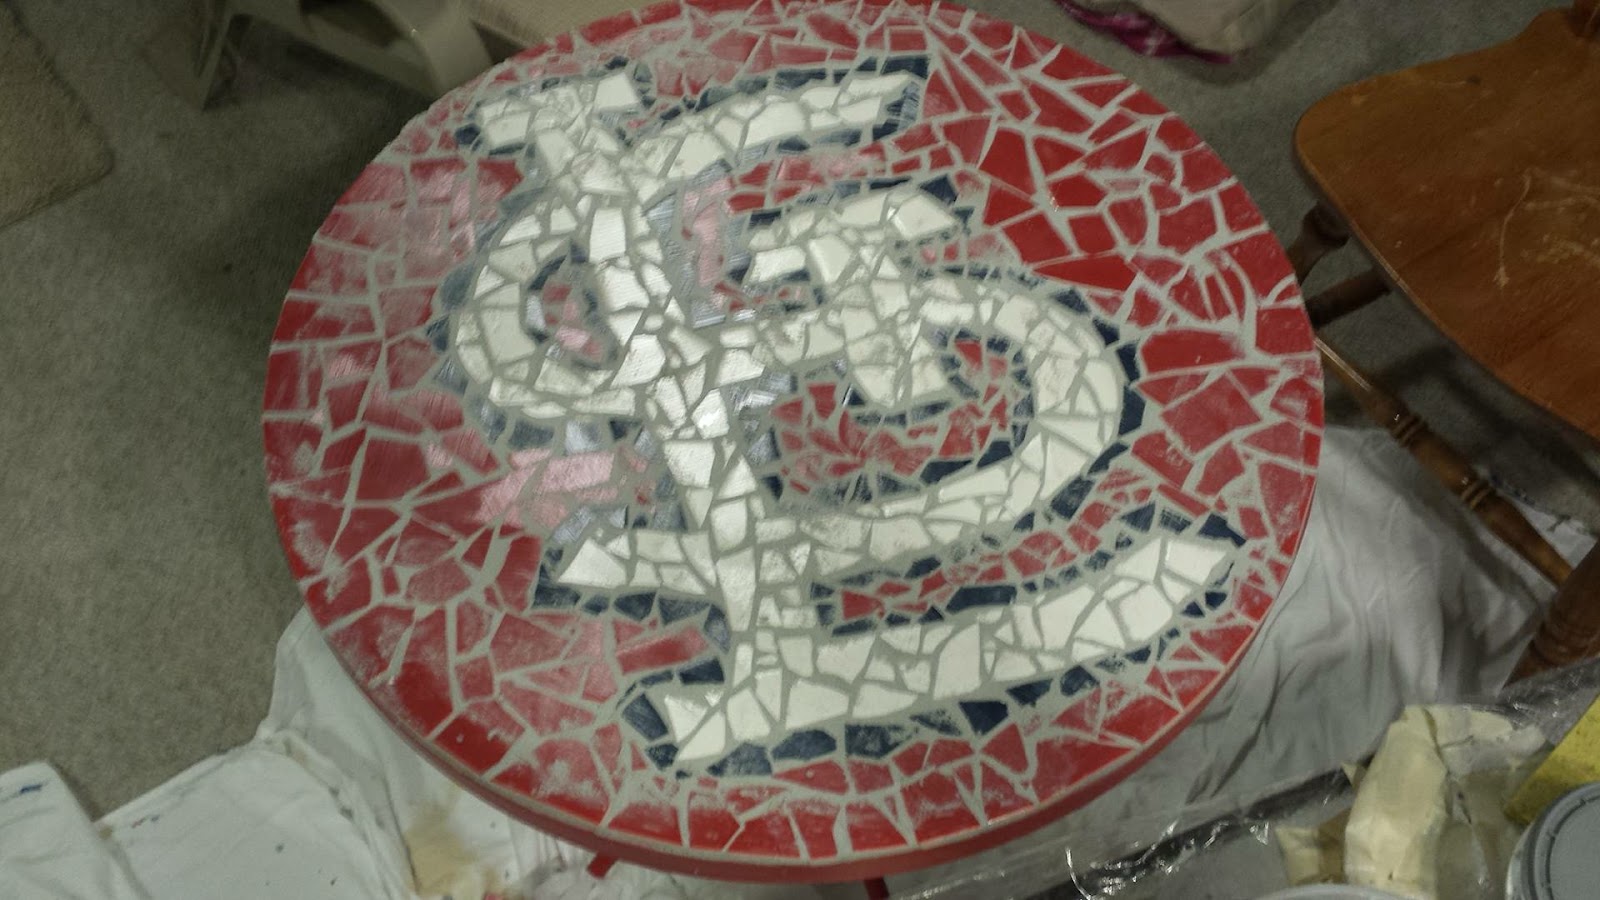
Step 3:
Lay your tiles.
I liked doing it by section. This is where I sometimes used tweezers, needle nose pliers, chopsticks or screwdriver to move pieces around. I would lay out a small section, then carefully put a strip of masking tape over the section making sure to press down well so the tiles adhere, this would keep my design intact for glueing. I lift up the the strip, put glue on the bottom of the tiles using a popsicle stick (don't have a picture of this, but I'm sure you can glue. Then lay the section back down and press down. Leave the tape on for about 20 minutes. Keep working on more sections as the glue dries. When you take the tape off, with the chopsticks I would remove the excess glue. It takes about 48 hrs to totally harden, it's playdough consistancy at this point.


For the edging of the table, I first put masking tape all around the table, with a "lip" sticking up to give me an edge. I saved and used pieces that were from the sides of the tiles after they were cut, that way I knew they were smooth. I layed them all out, then glued them down one by one. Then fill in the rest of the table. Let dry 48 hours.


Step 4:
Grout
I left the masking tape all around the table, then I grouted it all, pressing it in really well with a floater. Remove the tape and if necessary add more grout with my fingers between the tiles that make the edges, make sure there are no sharp edges sticking out. Smoooth and remove excess grout with the grout float, BUT do not wiping with wet spong off for 12 hours. It will be a little harder to get off, but this will keep the grout more even with the tiles. Wait about two days to clean any haze off the tiles.


Bring the table indoors in the winter. I was told the cold, ice and snow would absorb into the tiles and cause them to crack.
The Cushions I don't have a tutorial for, I had just happen to buy a sewing machine on clearance ($100!) that did embroidery and I figured out how to use it. I also learned how to pipe cord around the cushion. I did test all fabric and thread in a bit of bleach water first.
I did initially buy outdoor red thread because I was only going to do the baseball design. Then I decided to do the bird on the bat and needed yellow and blue, which of course I could not find in outdoor thread, so used regular polyester. They sell a UV fabric spray which I might just buy and spray on the cushions.


ENJOY!!!